With roast scheduling, you can create production plans on the artisan.plus platform with just a few clicks. Execution is supported by Artisan, including batch preparation, roasting status, weighing the resulting roasts, and feedback of progress back to the artisan.plus platform for tracking.
Roast Planning
Schedule roasts for multiple machines, team members and storage locations. Create schedules by expected yield or optimal batch size using weight loss from selected roast templates or previous roasts. Schedule batches for a single bean, as well as pre- or post-roast blends.
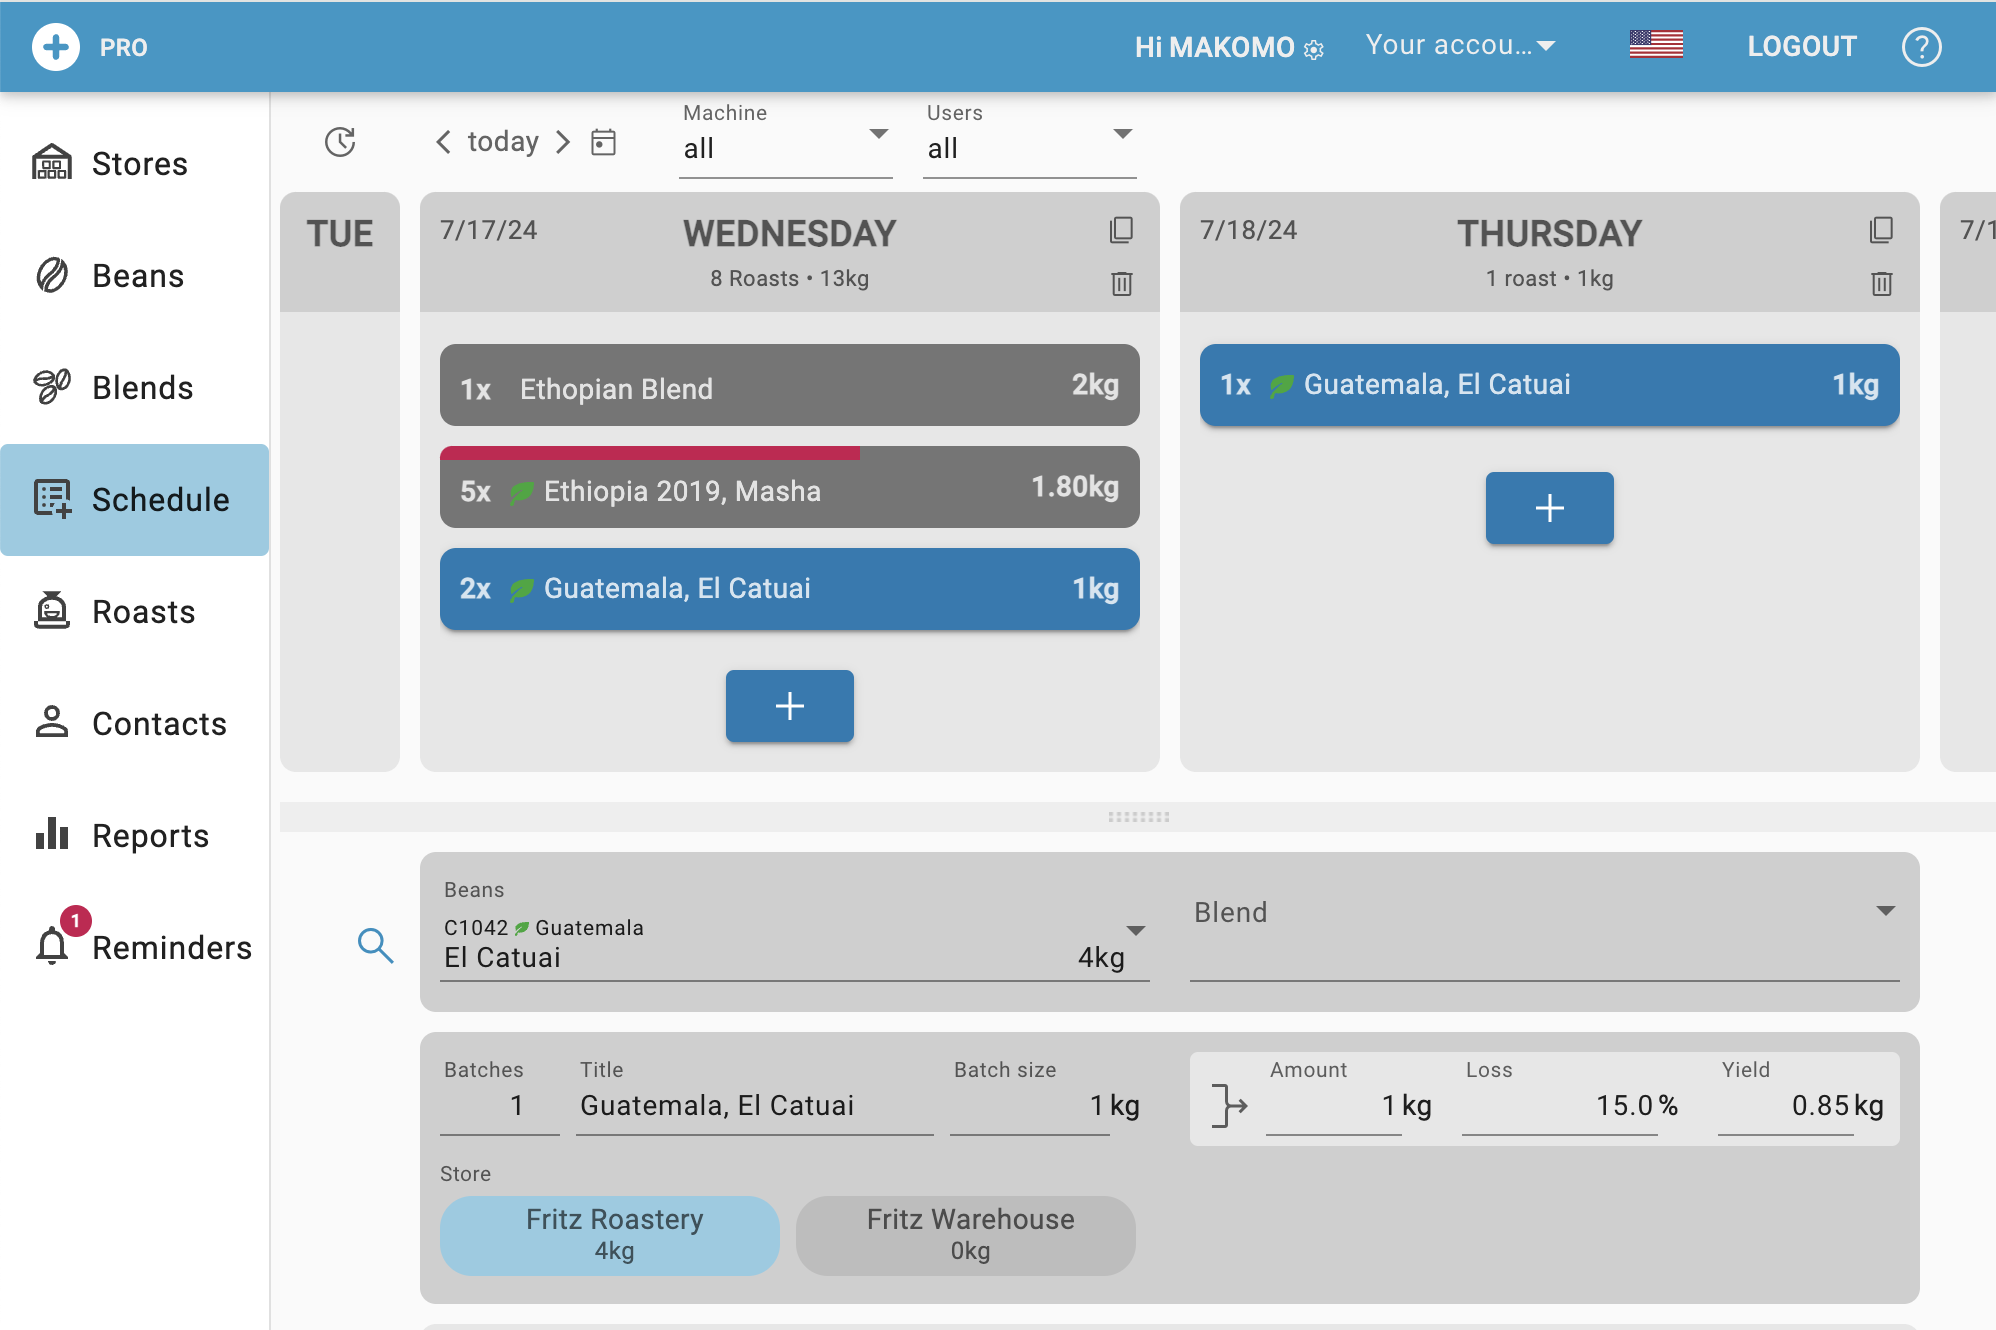
The Schedule tab displays the total scheduled batches per day at the top and details about the individual scheduled items in the section below.
Schedule
For each day, the planned batches are listed in order. Press the reload icon to fetch the latest state from the server. Use the controls above the calendar view to navigate back and forth across the days, select a specific day using the calendar icon, or jump back to today. Choose a subset of machines or users to filter the schedule items listed. Use the copy icon to copy the whole schedule of a day to another one and use the trashcan icon to clear all items scheduled for that day.

The planned batches per day are listed by schedule items. Each item shows the number of roasts to be completed, the bean or blend name, and the planned batch size. Items that can still be edited, moved (by drag & drop) or deleted are shown in blue. Items that can no longer be modified, moved or deleted are shown in grey as they are locked. Once a roast session is started all items of today will be grey but for new items which were added during the session. Items that have been started have a red bar at the top indicating the number of batches still left to roast. Started items are always locked.
You can zoom out to get an overview of your schedules per month or several months and filter the items by machine and user.

There is one last control in the top row which toggles the calculation of the remaining stock as displayed in beans popups and the recurring configuration dialog, either taking into account scheduled, but not yet roasted items, or not.
Watch out! The web scheduler is (mostly) a static page and does not automatically update after the Artisan app submitted completed roasts to the server. To refresh the page, click the small refresh icon in the top left corner of the Schedule tab.

Watch out! Once you start executing your roast plan by pressing START in Artisan all items of today get locked (shown in grey) and cannot be edited any further. This is to avoid confusion on the production side.
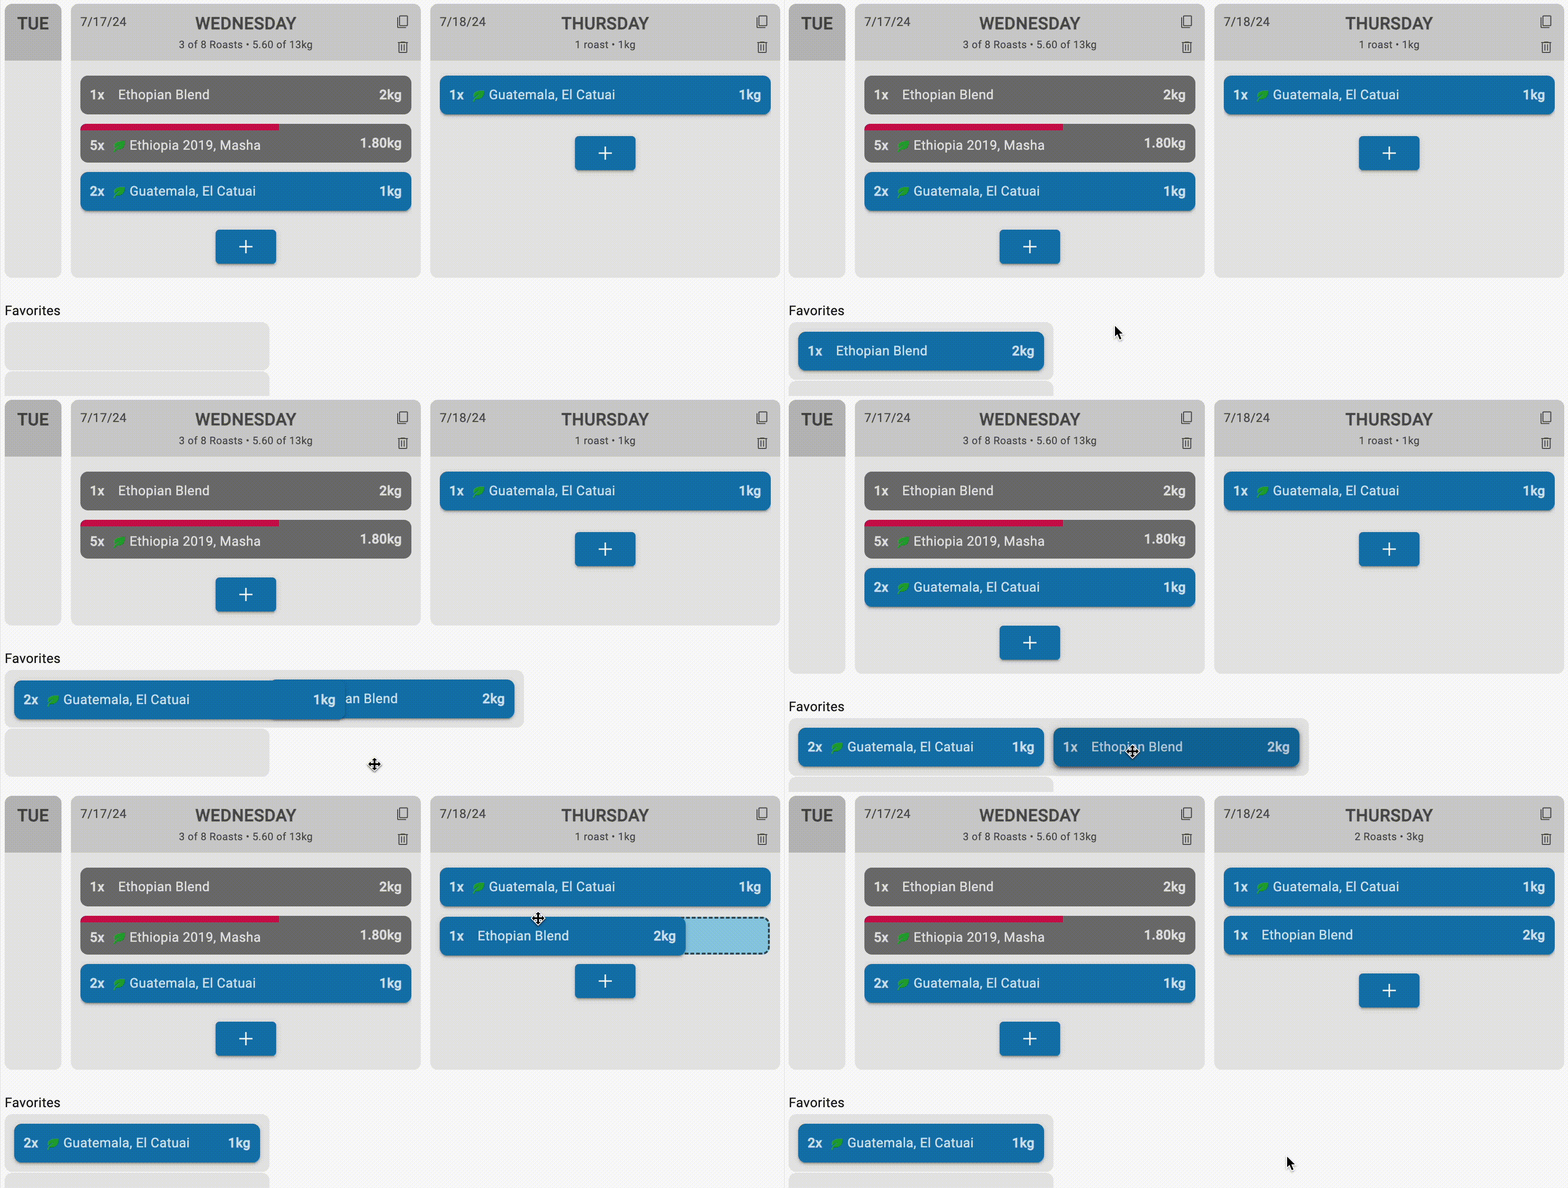
You can use drag & drop to rearrange the daily schedule or move items to another day.
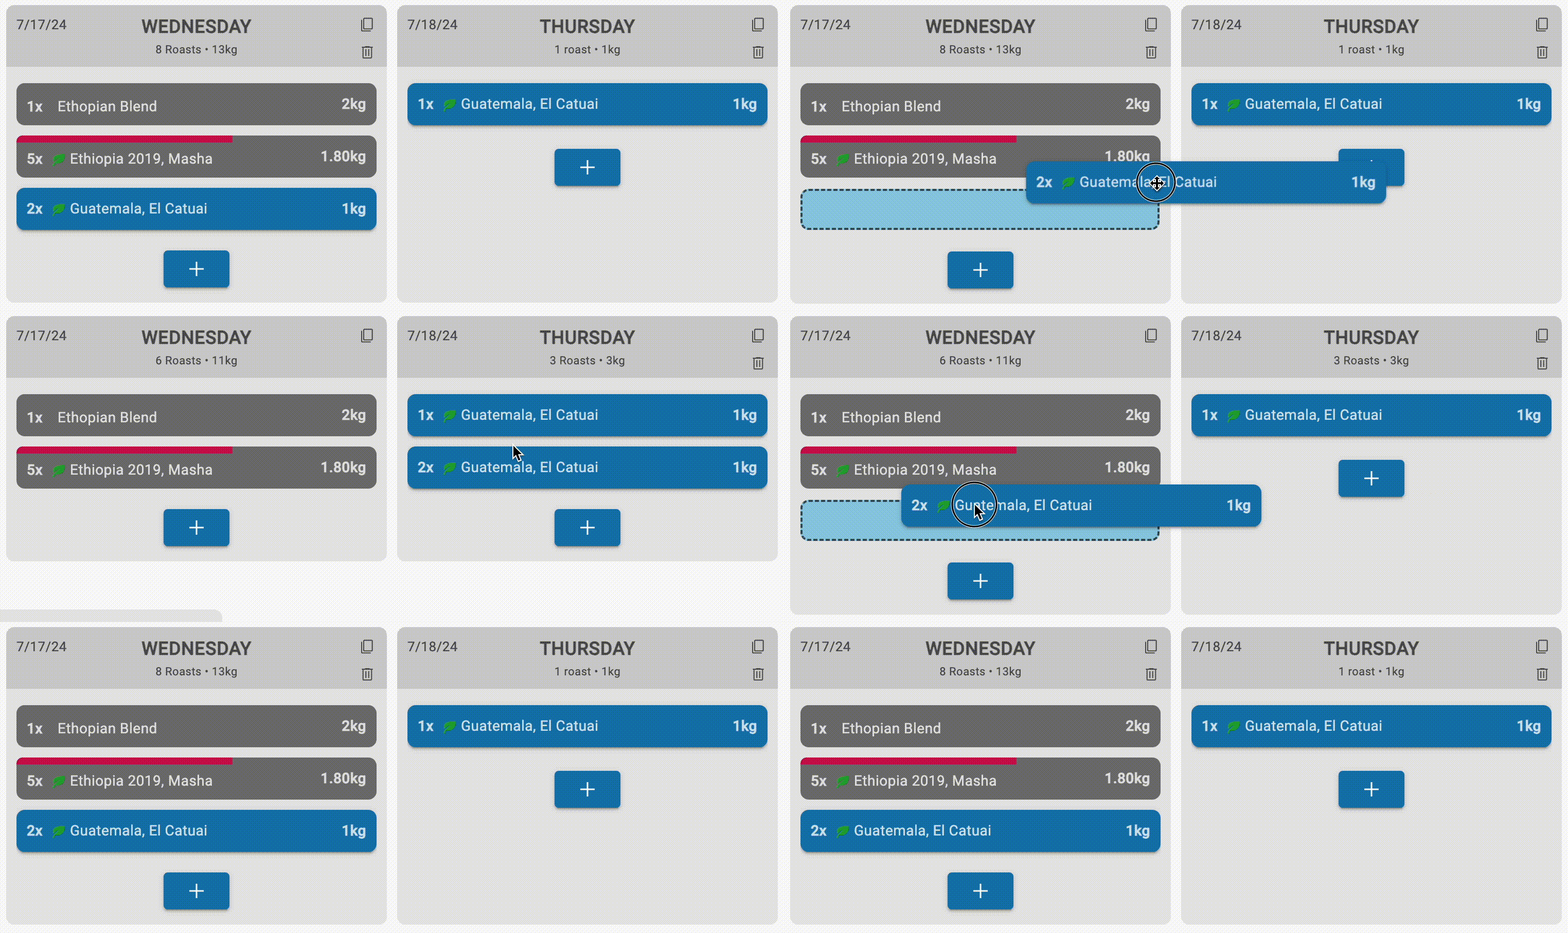
Watch out! Moving a grey (locked) item by drag & drop creates a copy instead of moving the original item. Similarly, if you hold down the OPTION/ALT modifier key the drag & drop of a blue (still editable) item, creates a copy.
Hover over a scheduled item to see details such as blend ingredients and ratios. Click a blue item to edit all of its properties and click the red trash icon while an item is in editing mode to delete it.

To add a new schedule item according to the specification in the Schedule Item Details in the lower part of the tab (see next section), click the blue plus button.
Schedule items
The lower part of the Schedule tab displays the details of the selected schedule item.
What to roast?
First, you choose either beans or a blend and decide what you want to roast.

Only beans and blends that you have in stock are listed in the pop-up menus. The search symbol on the left can be used to plan items that are currently out of stock.
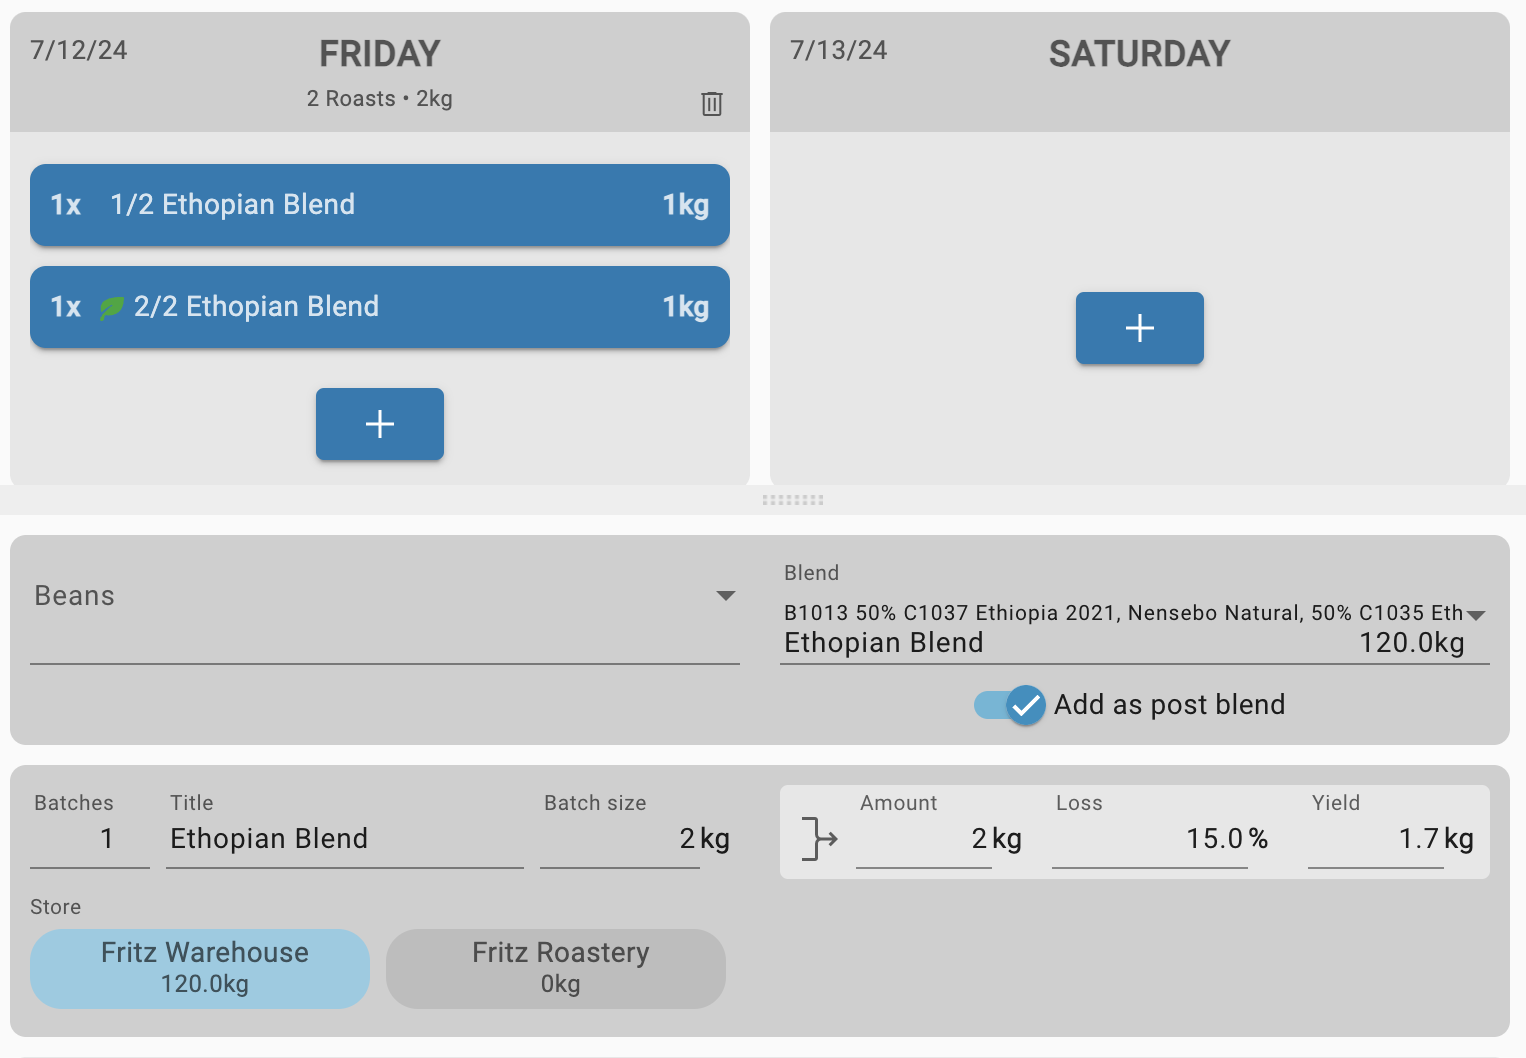
When selecting a blend, only one schedule item is created by assuming a pre-roast blend. Enabling “Add as post blend” will instead create individual items per blend ingredient.

Watch out! The “Add as post blend” switch only affects the generation of a new blend. Blend items added while “Add as post blend” is enabled are not linked in to the blend, only to the individual coffees of the blend.

How much to roast?
The second grey box defines the amount to be roasted. First, set the number of batches, a title and the desired batch size and see the amount of greens beans needed. The yield is calculated based on the specified roast loss. Alternatively, you can define your schedule item to achieve a target yield. To do this, first set the required amount of roasted coffee and view the number of batches based on the roast loss and batch size.
Set the measurement unit
A click on the weight unit toggles between kg/g and lbs/oz, respectively.
Watch out! The standard roast loss for the yield calculation is taken from the selected roast template (see below). Otherwise, the standard loss is derived from previous roasts of the same beans or blend.

Adjustments
If the yield isn’t what you expect, you can adjust the batch size (“save n kg”) or the amount of greens (“3x n kg”) and adjust your yield.
For example, suppose your target yield is 4kg. Now you have 2 options.

a) Clicking on the blue “Save 0.74 kg” in the example above reduces the batch size from 1.8 kg to 1.554 kg, thereby achieving exactly the target yield.

b) Clicking on the red “3 x 1.8 kg” in the same example keeps the batch size but adjusts the quantity instead. This triggers a recalculation of the yield, which now exceeds the original target by 0.633 kg.

In both cases, the blue “from history” tags indicate that you have previously roasted this coffee with a different batch size (2kg) and roast loss (11.7%). Clicking on these tags adjusts the batch size and roast loss to the specified values.
How to set a template?
A previous roast can be selected from the dropdown as template for the planned batches, and if desired a note to the roast master can be added too.

The template dropdown shows all templates you have used or might want to use for the selected beans. If the one you want is not listed, search with the magnifying glass.
Watch out! The template pop-up only contains roast profiles roasted on the selected machine that have been marked as a template and those that you used before for the selected beans on that machine.
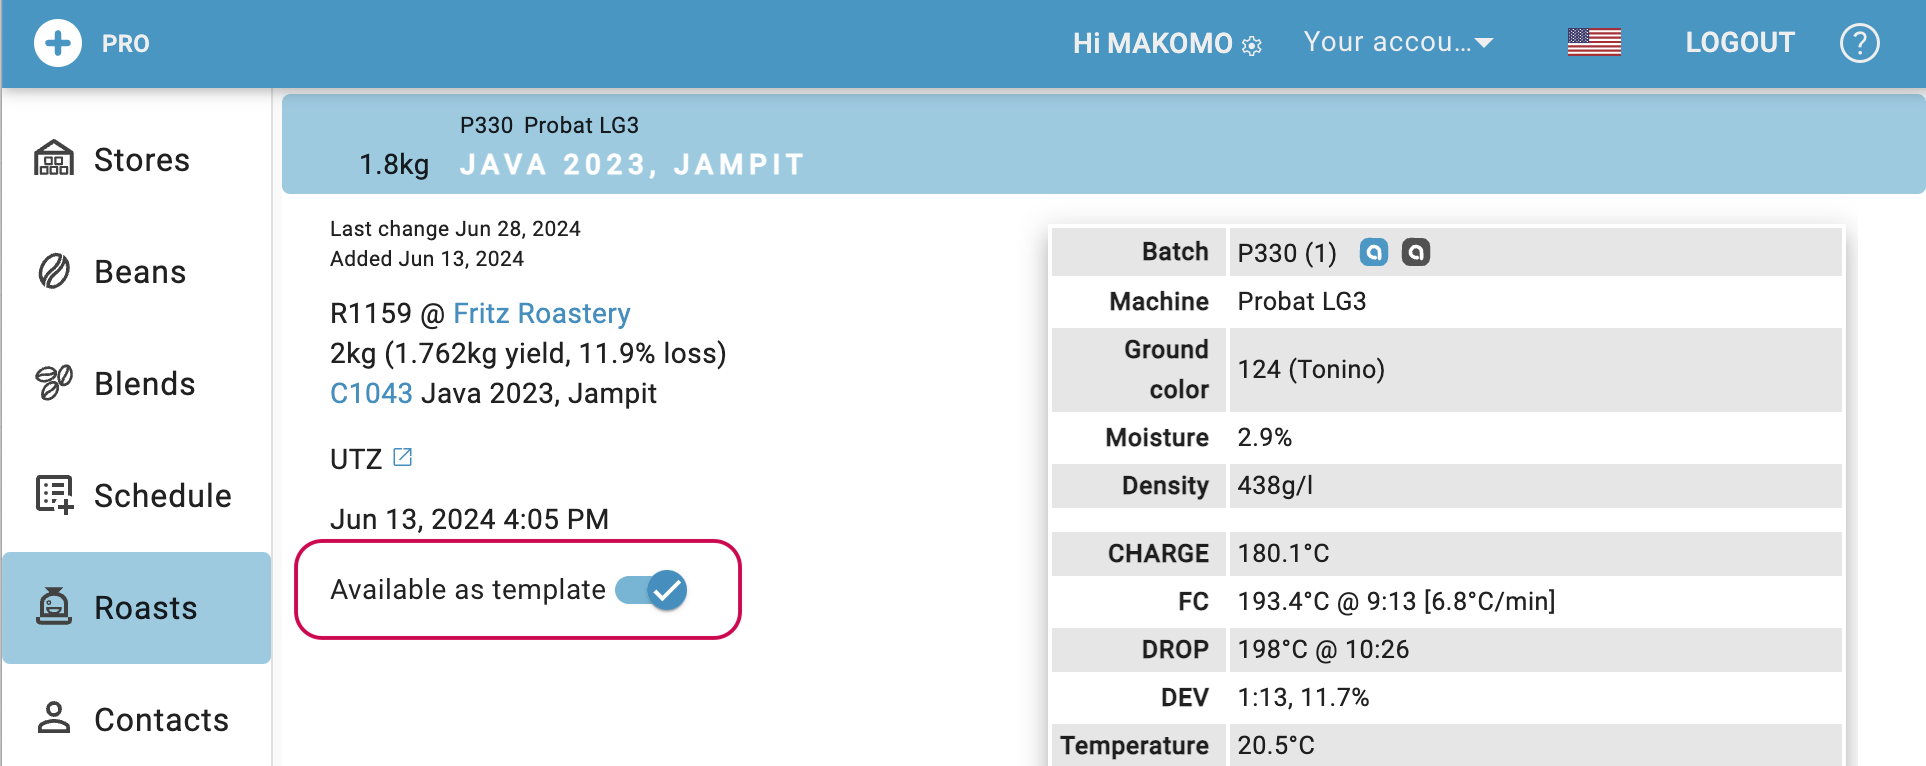
Clicking on the search symbol on the left also allows you to find roasts that have not previously been marked as templates or have roasted a different bean or blend.
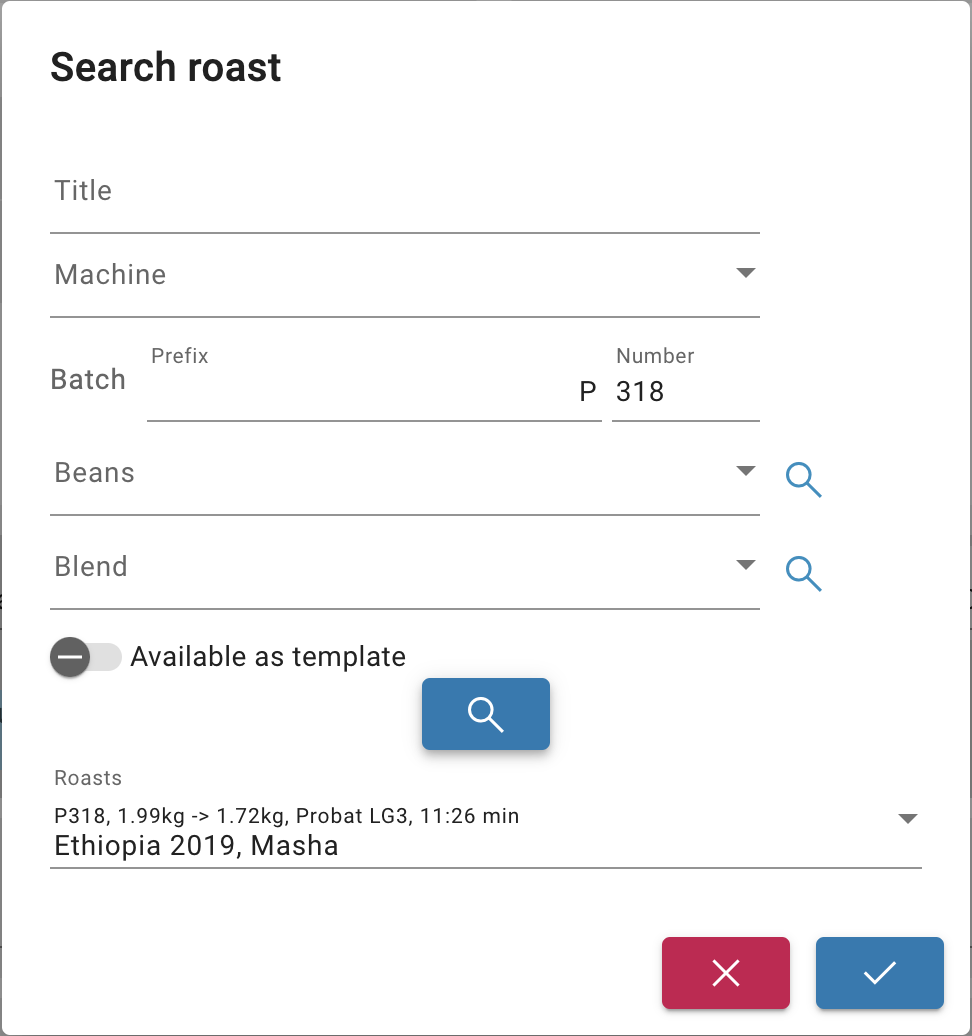
Watch out! Selecting a template also sets title of the schedule item to that of the template.
Who should roast? On which machine?
By selecting a machine or user, you can specify who should perform the roast and on which machine. During plan-execution, by default only the scheduled items of the current user and machine are displayed.


Clicking on the + symbol next to the machine selection allows you to quickly add a machine name, while clicking on the curved arrow allows you to rename machine names system wide.
Favorites
Below the calendar view there is an area where schedule items regularly used can be stored for quick retrieval.
Recent items
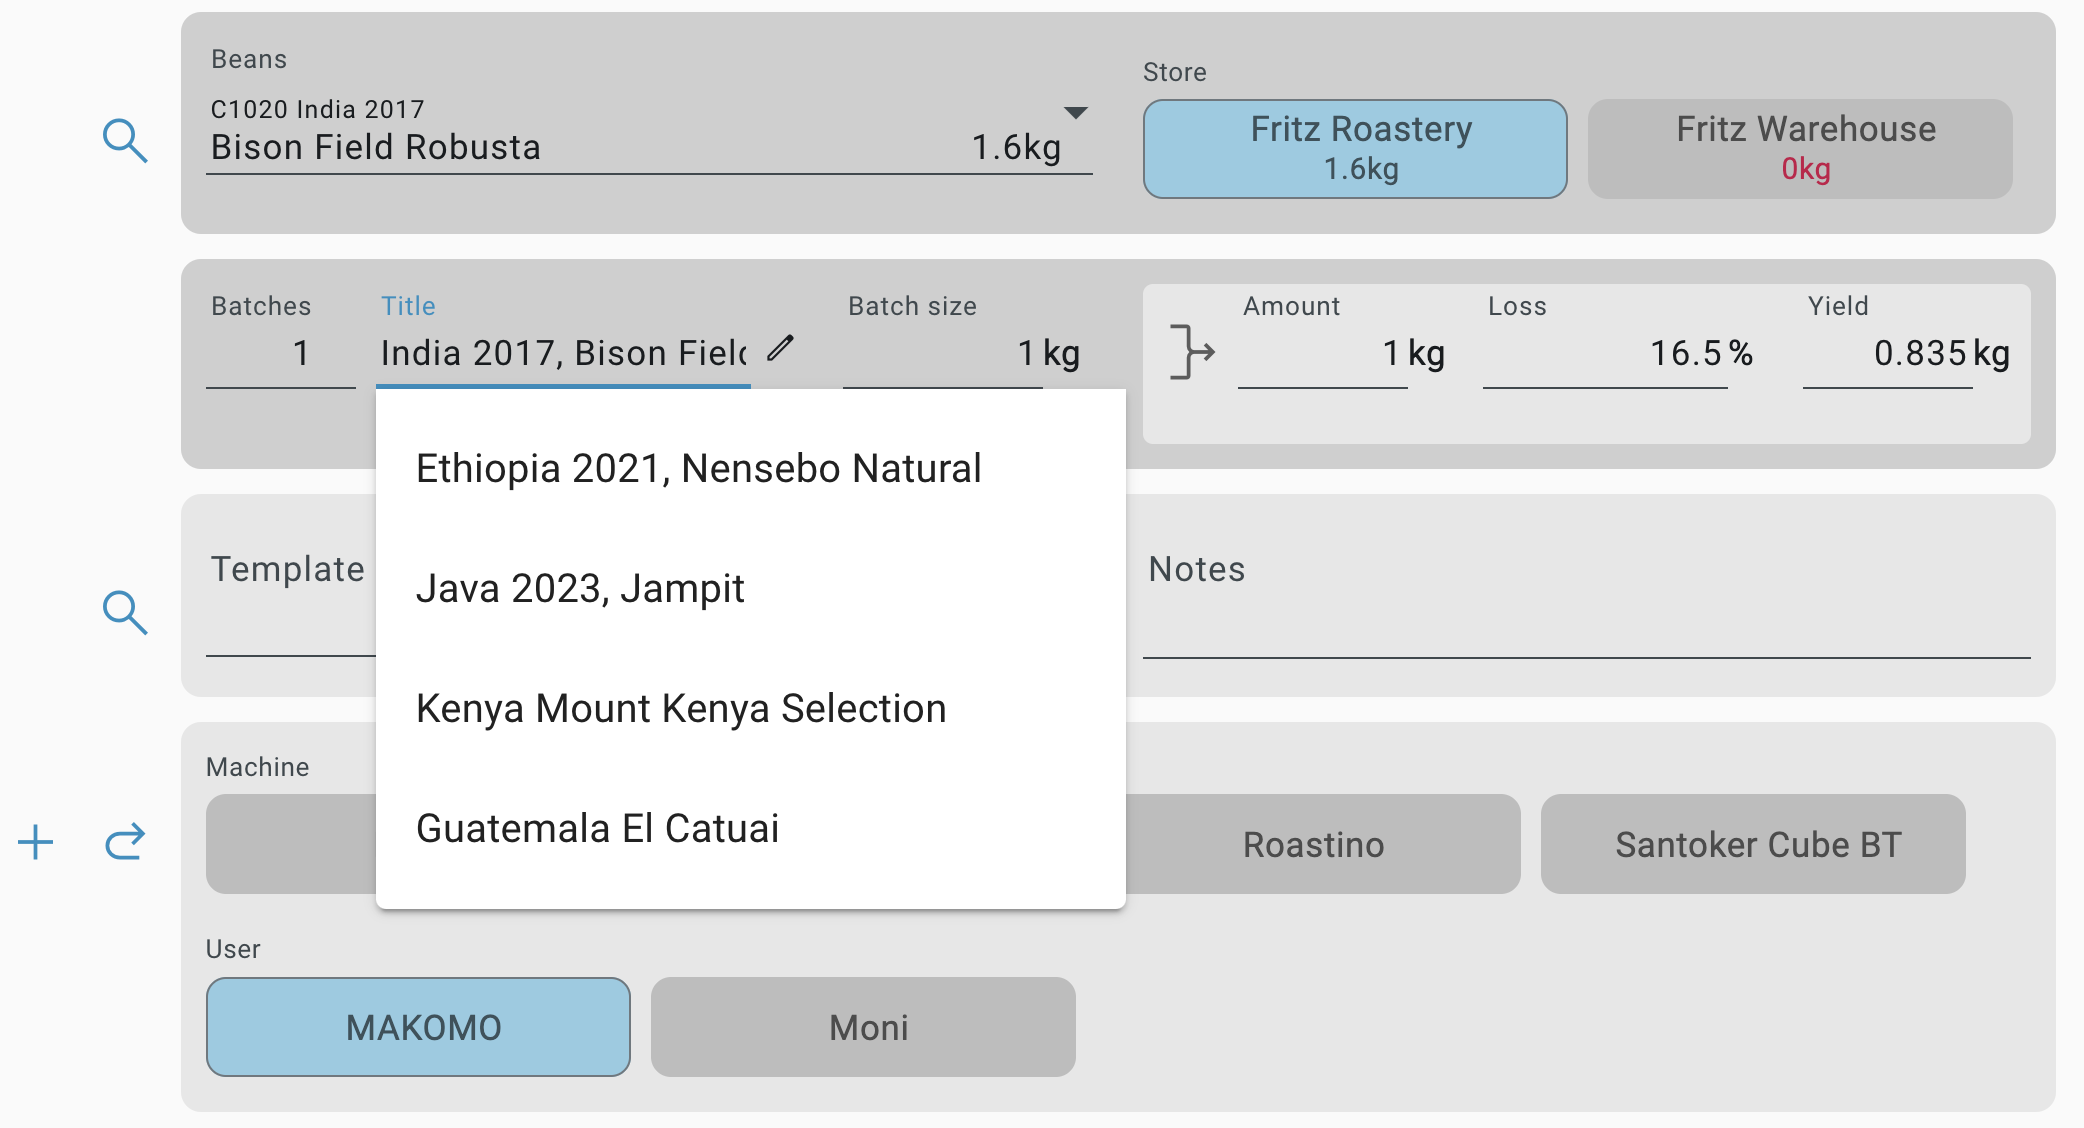
A click on the title input field reveals a list of recently planned items for a quick recall.
Item details
A schedule item can be expanded by a click revealing its details. Unlocked items will enter the edit mode allowing for further modifications or deletion.

For already locked items one can retrieve the list of already registered roasts.
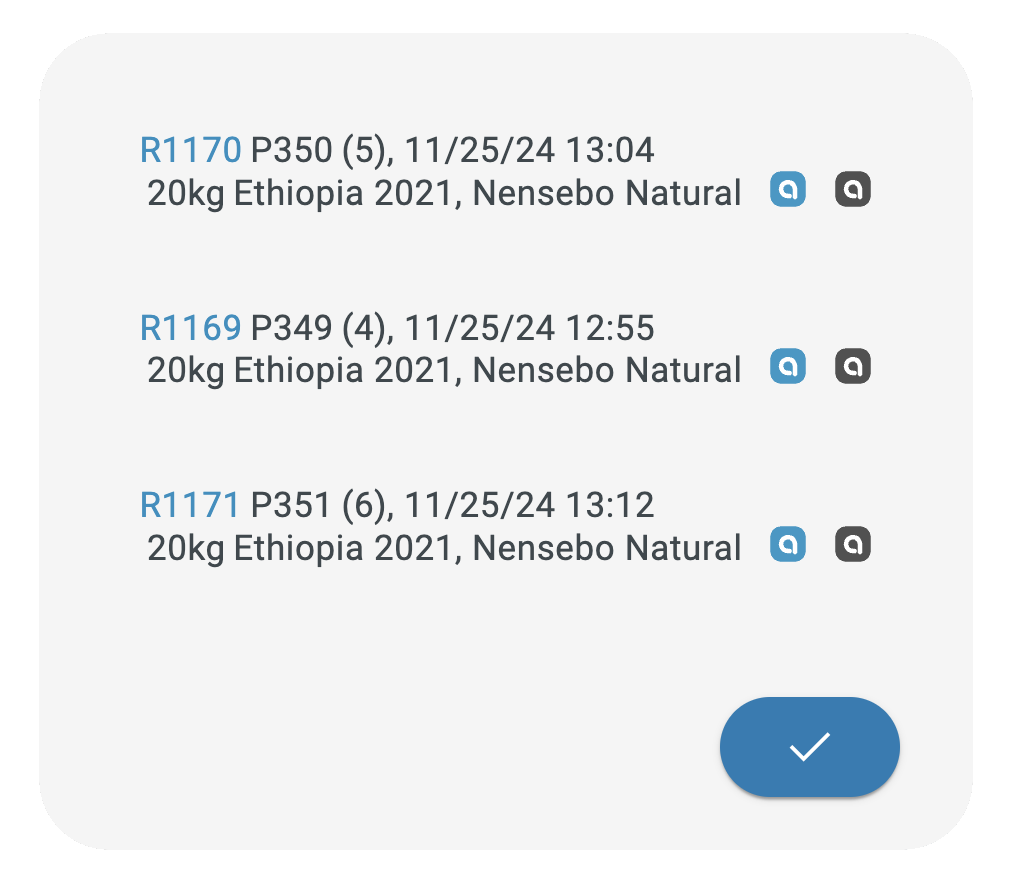
A click on the Artisan icon opens the corresponding roast in Artisan. The blue icon loads it to the foreground, the dark icon into the background.
Recurring items
Individual items can be made recurring from item details, all items of a day from the days title bar. You can specify the period the schedule should be repeated and how often. The dialog indicates the maximum reach possible with the current stock and item details, taking into account the already scheduled items or not.

Plan Execution
The Artisan scheduling module keeps your schedule synchronized across multiple machines and locations. There is no need to explicitly publish scheduled items on the artisan.plus platform to reach Artisan, nor is manual syncing required.
You start the scheduler in Artisan by opening its window from the Views menu (menu View >> Scheduler). The scheduler window consists of two tabs. The first, To-Do, lists the planned batches in order (next task on top), and the second, Completed, lists the already completed roasts (last roast on top). Both tabs feature a tooltip (shown on hovering on the tab title) which reports the total number of batches to be roasted and the total number of batches already completed, respectively.
Watch out! The scheduler is active as long as Artisan is connected to the artisan.plus platform and the scheduler window is open. If the scheduler is not active, completed roasts will not adjust the schedule.
TO-DO
The scheduled items are listed under TO-DO in the order originally planned on the artisan.plus platform. The items can still be rearranged in Artisan using drag & drop. There is always one item selected, shown in blue. The selected item is the one that will be roasted next. Items that are set for the specific user and machine of this Artisan are shown in dark grey, all other items are shown in light grey. The tooltip of each item contains detailed information such as the weights of the individual ingredients for a blend.
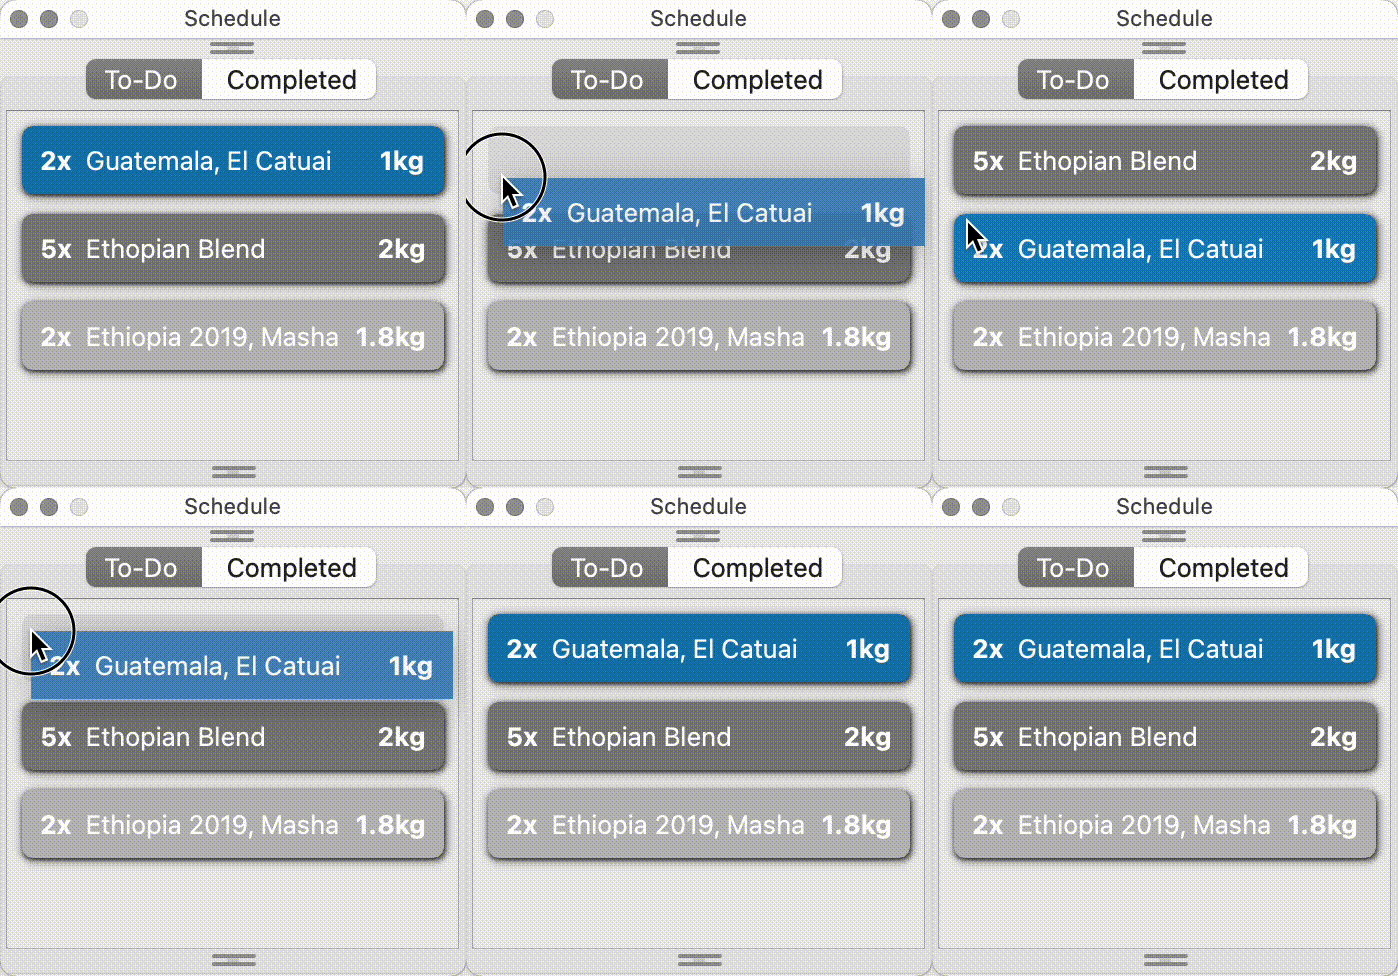
When you select a schedule entry with an associated template, the corresponding profile is loaded in the background. While Artisan is ON and sampling, but not yet recording, the properties of the selected schedule item are set as the roast properties for the current roast.

When a roast is recorded while the scheduler is active, the resulting roast is registered at DROP. If this was the last pending roast of the current selected schedule item, the item is removed from the TO-DO list and the next item in sequence is selected.
In case you decide not to roast a planned item, you can move it to the end of the session and stop roasting just before it is coming up. Alternatively, you can hide items by right-clicking on them and selecting “hide” or simply dragging them out of the schedule window. If you did hide an item accidentally, you can make it visible again by first deactivating the “Visibile” filter (see next section for details on filters) and then right-clicking on the item and selecting “show”.

Filter
Artisan not only fetches the items scheduled for today from the server, but also those for the next roasting day. By default, these items, as well as items scheduled for another machine or user, are not listed but filtered. At the bottom of the planning window there is a drawer where the date, user and machine filters can be deactivated.
Once deactivated the previously filtered items are listed as well. This allows you for example to roast items planned for the next roasting session today, if time allows. Note that items that are not scheduled for today rendered slightly differently, in unfilled style with just the border colored in grey (unselected) or blue (selected).
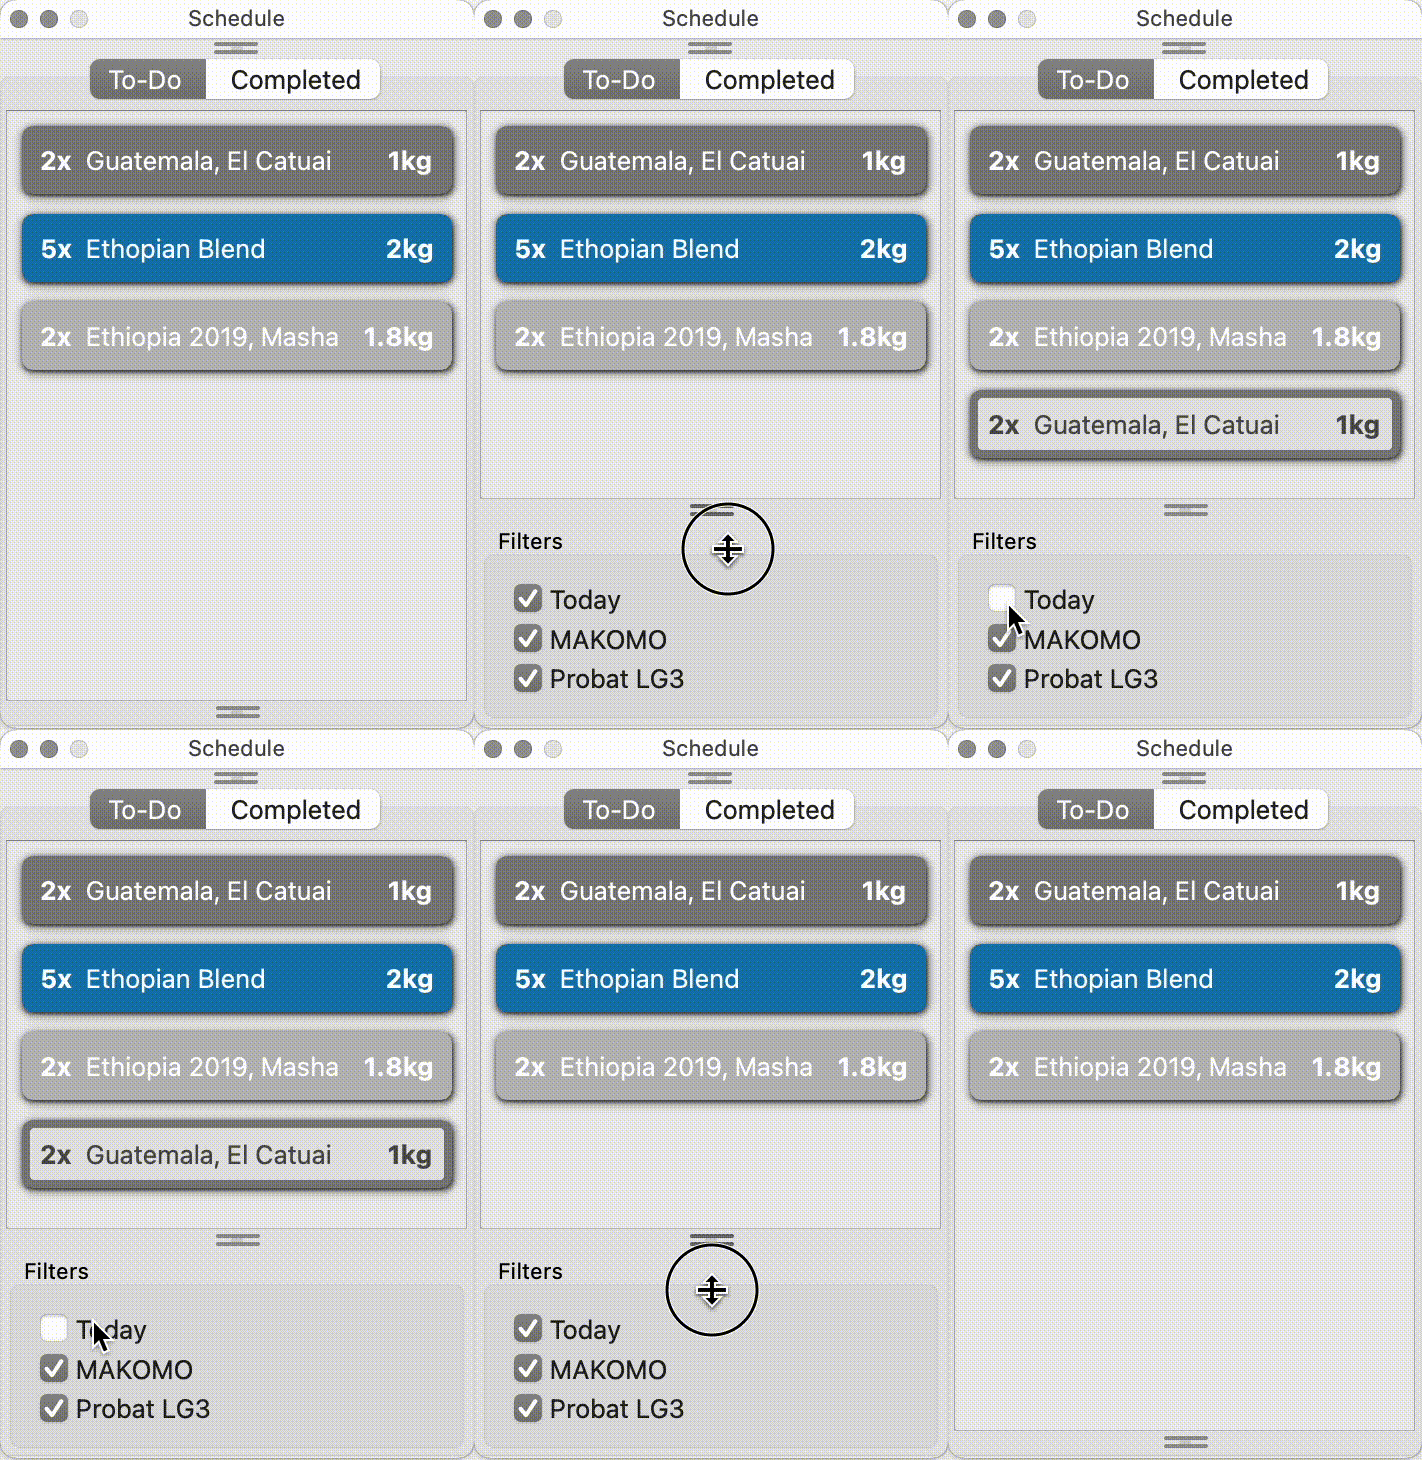
Watch out! The configured machine name can be changed in Artisan under Setup/Machine (Roast >> Properties menu, last tab). Use “Save Defaults” to apply the machine name change. The current user can be changed by logging out of the artisan.plus platform from within Artisan and login as a different user (see Artisan Integration.
Ready for roasting
A batch is ready for roasting when the green coffee has been weighed into a bucket according to the planned batch size. The Artisan scheduler offers some bookkeeping for batch preparation. You can open the drawer above the schedule, which displays the next item, w.r.t. the current schedule, not yet prepared. A simple click on the batch size marks the corresponding item as prepared. If all planned batches for an item have been prepared a filled dot is displayed in front of an item’s batch size. You can set all batches to either prepared (or unprepared) by selecting the corresponding menu item from the popup that opens when you right-click an item.
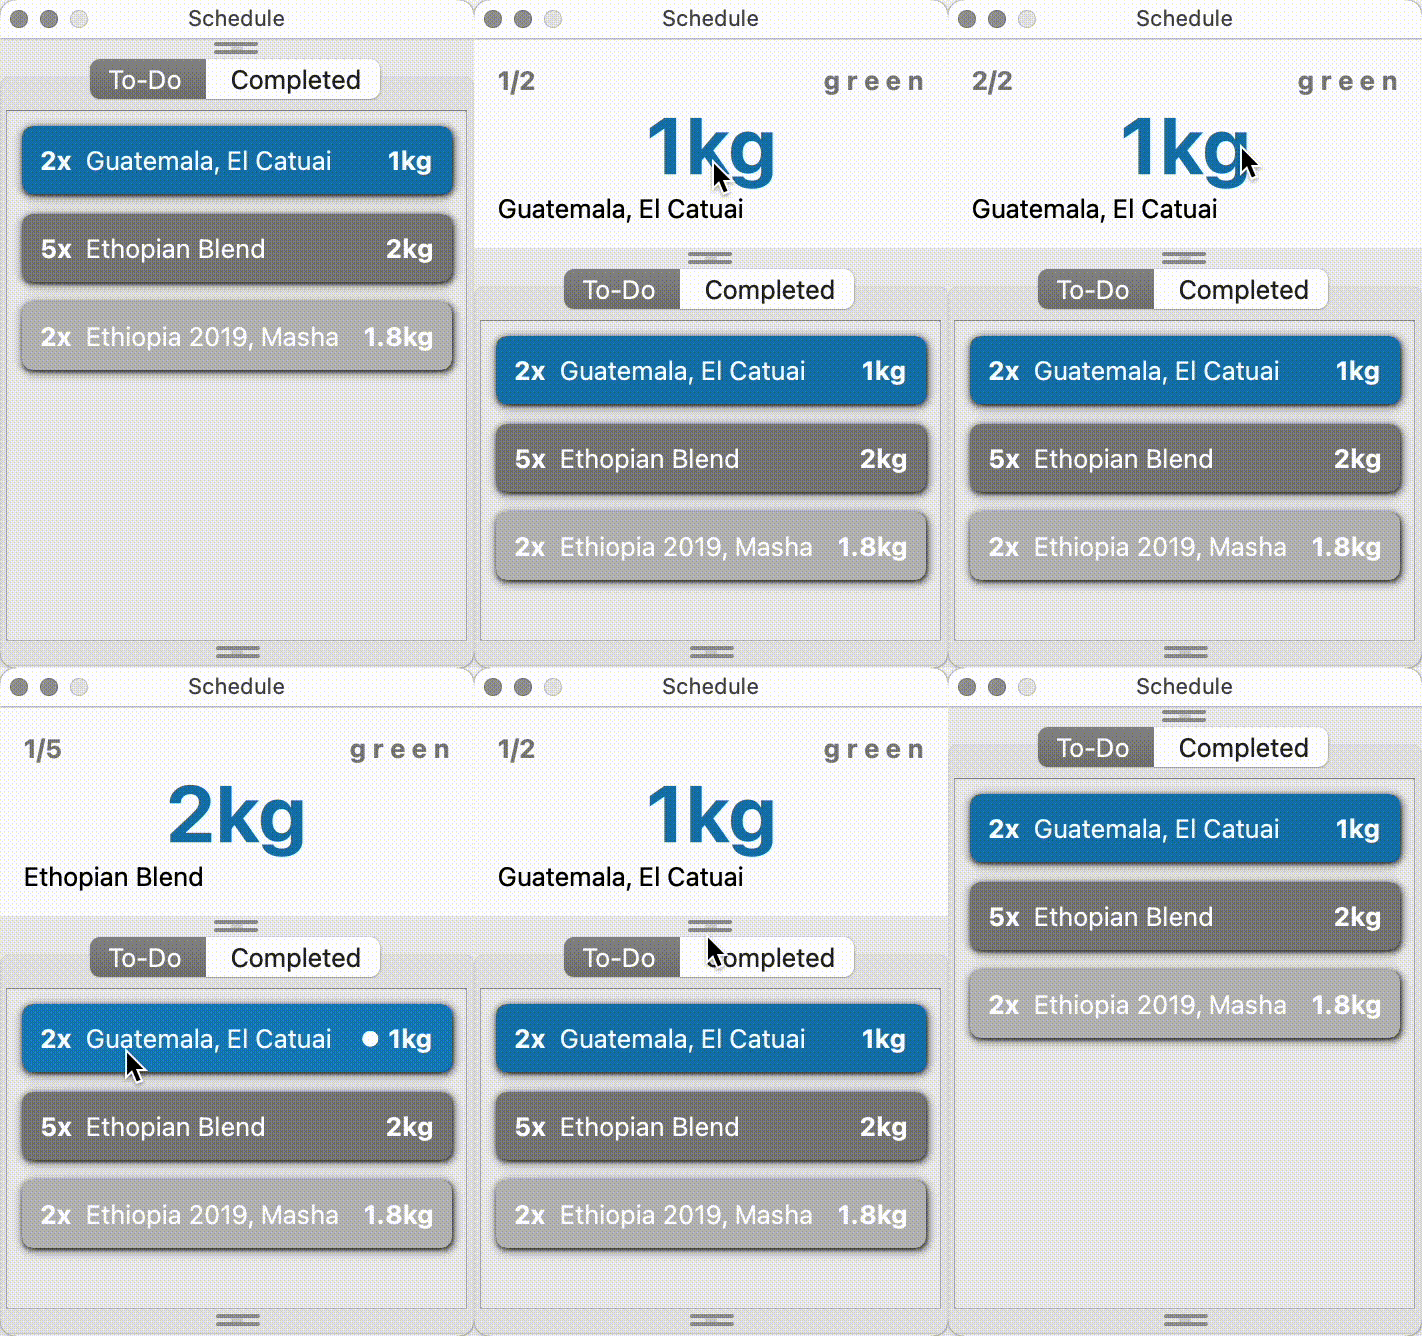
Watch out! Marking items as prepared is optional and is for your preparation bookkeeping purposes only. Scheduled items can be processed if not marked previously as prepared before.
The number of open tasks is indicated by a red circle on the app icon.

Register roast
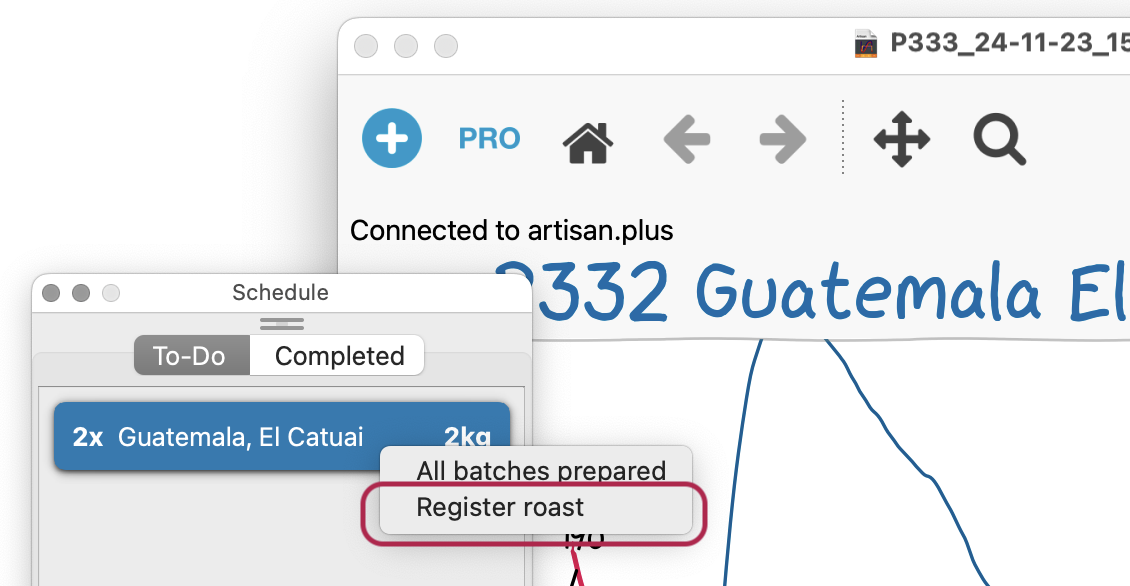
In case you roasted a batch of today’s schedule with the scheduler off (scheduler window closed), you can still assign that roast to the schedule by loading its roast profile and doing a right-click on the corresponding schedule item and selecting “Register roast” in Artisan.
Completed
The second tab lists the finished roasts. The roasts of the current session are shown in blue, the ones of the previous session in grey. The roast weight is shown after the name if it has been explicitly specified.
Selecting a completed roast will open an editor where you can quickly set the key roast properties such as roast batch weight, roast color, roast density and moisture measured after roasting. If the roast batch weight has not been measured and explicitly set, it will be taken from the roast template or estimated weight loss from previous roasts and rendered in grey.

Watch out! You can navigate both the TO-DO list of scheduled items and the Completed list of roasts using the up/down keys. You can switch between tabs using the left/right keys. Pressing the ENTER/RETURN key on a completed roast will toggle its editing mode. Holding down the ALT key (Windows) or OPTION key (macOS) and clicking on a completed item while Artisan is turned OFF will load the corresponding profile.


